Receive Pipeline Notifications
This page demonstrates a short program that uses the Quantemplate API to receive alerts when a pipeline has executed
PrerequisitesBefore trying this example, make sure you have followed the guide to Setting Up a Connection
Step 1: Configure sharing in-app
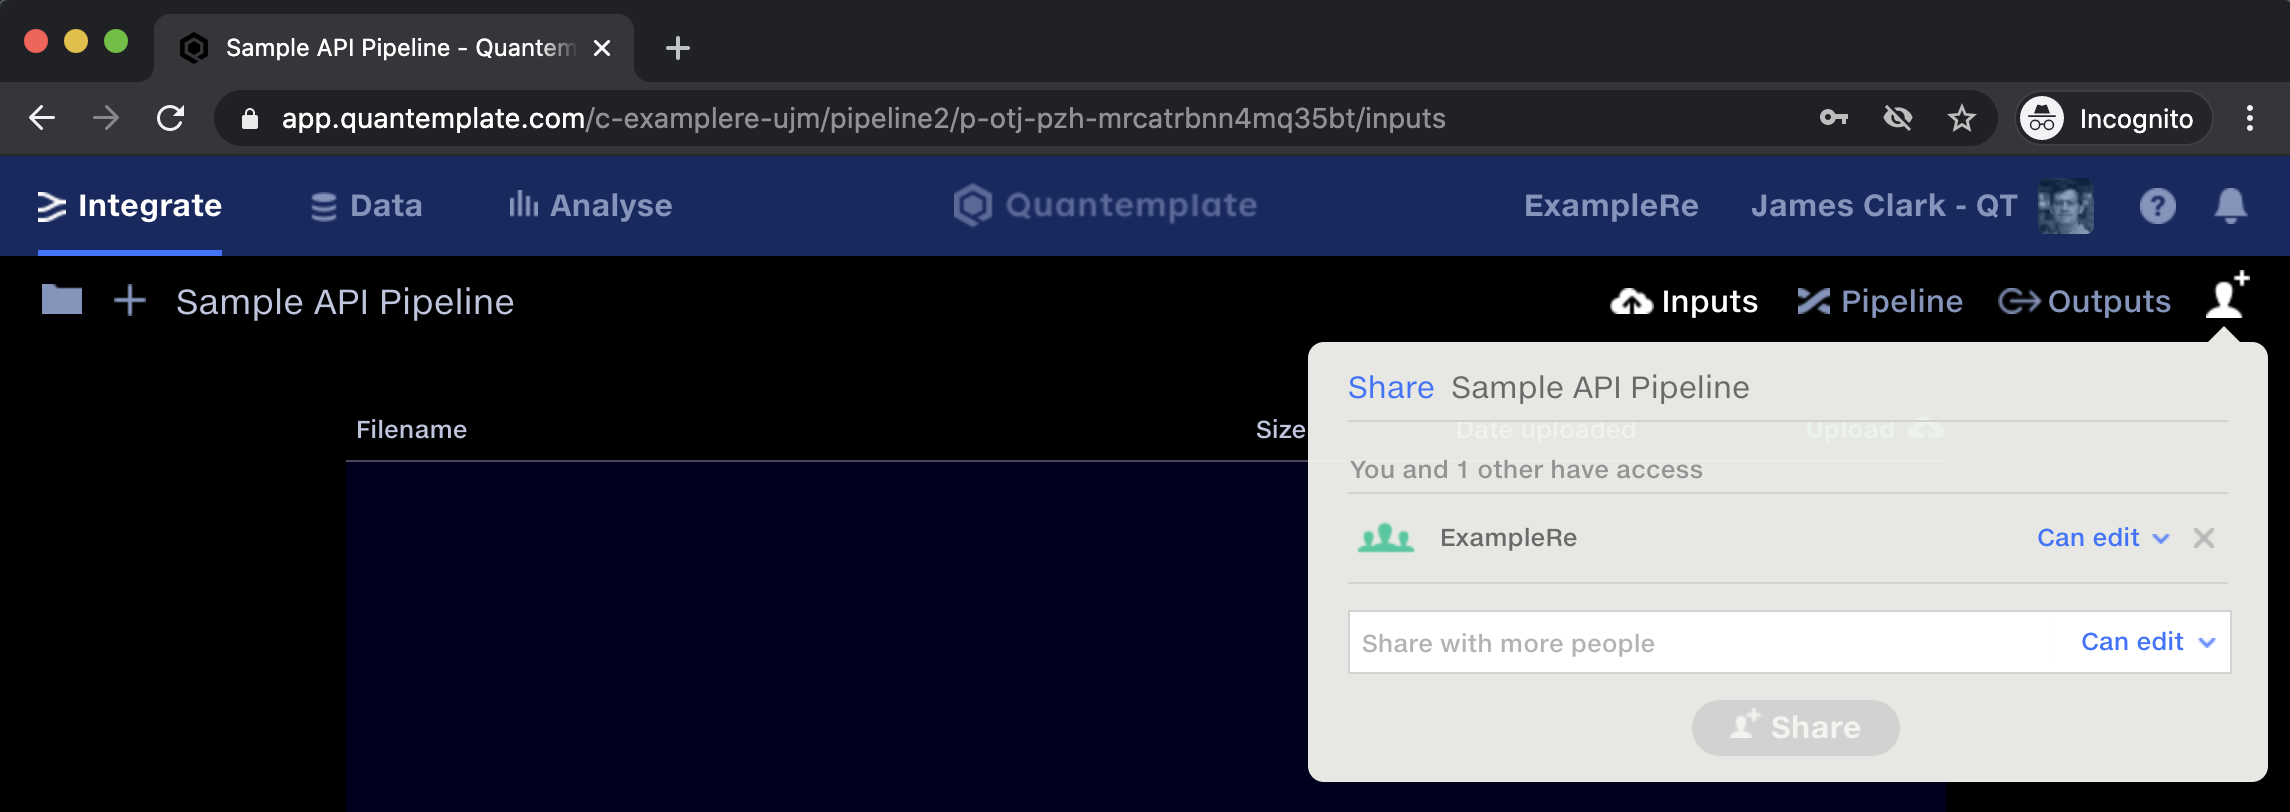
In the Quantemplate app, we navigate to the pipeline that we want to receive notifications for. We share the pipeline with the whole organisation in order to give the API access.

Share the pipeline with the whole organisation
In this example:
- Organisation ID is
c-examplere-ujm - Dataset ID is
p-otj-pzh-mrcatrbnn4mq35bt
Step 2: Set up a receiver for notifications
Quantemplate notifications are delivered via webhooks. A webhook is an HTTP callback: You provide Quantemplate with a URL, and when an event occurs, a POST request will be made to the URL that you provided.
Web server
To receive the HTTP callback, we'll set up a simple web server. Running the following program will keep the server open on port 8765 until you exit using ctrl+c:
Code (Python 3)
#!/usr/bin/env python3
from http.server import BaseHTTPRequestHandler, HTTPServer

PORT_NUMBER = 8765

class WebhookHandler(BaseHTTPRequestHandler):
  def do_POST(self):
    content_length = int(self.headers['Content-Length'])
    post_data = self.rfile.read(content_length)

    print(post_data.decode('utf-8'))

    self.send_response(200)
    self.send_header('Content-type', 'application/json')
    self.end_headers()

server = HTTPServer(('', PORT_NUMBER), WebhookHandler)
print('Started httpserver on port', PORT_NUMBER)

try:
  server.serve_forever()
except KeyboardInterrupt:
  server.server_close()
ngrok
The webhook URL we provide to Quantemplate needs to be publicly accessible to the internet. For the purposes of this demo, we can use ngrok, a tool for exposing local web servers to the internet. With ngrok installed and the web server running, we create the proxy:
ngrok http 8765
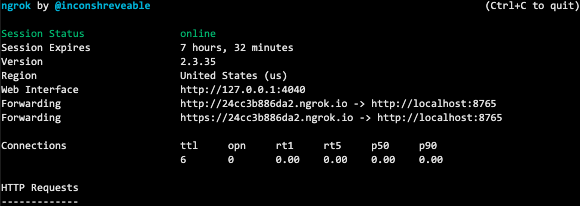
Running this command will set up the web forwarding that allows external entities to access our web server. After running the command, we see a screen like this, which tells us our public URL.

In this example, our public URL is http://24cc3b886da2.ngrok.io
Step 3: Configure Quantemplate notifications
We need to let Quantemplate know what our URL is. To do this, we authenticate as the API user, then create a new subscription by posting to https://api.prod.quantemplate.com/v1/subscription with our public URL:
Code (Python 3)
This code sample requires the requests library.
#!/usr/bin/env python3
import requests

user_id = ... # see Setting Up a Connection
secret = ... # see Setting Up a Connection
hook_url = ... # your ngrok URL from Step 2

def authenticate(user_id, secret):
  return requests.post('https://accounts.prod.quantemplate.com/auth/realms/qt/protocol/openid-connect/token', data = {
    'grant_type': 'client_credentials',
    'client_id': user_id,
    'client_secret': secret
  }).json()

def configure(access_token, hook_url):
  url = 'https://api.prod.quantemplate.com/v1/subscription'
  return requests.post(url, data = hook_url, headers = {
    'Authorization': f'Bearer {access_token}'
  }).content.decode('utf-8')


auth_result = authenticate(user_id, secret)

res = configure(auth_result['access_token'], hook_url)

print(res)
Running this program will configure Quantemplate to publish events to your web server. A successful run should print something like this:
{"id":"44740a85-bade-4faa-b423-1acdad47f671","organisationId":"c-jcre-hi","webhook":"http://24cc3b886da2.ngrok.io","audit":{"created":"2020-09-03T13:05:42.802435","updated":"2020-09-03T13:05:42.802607","author":"u-qt-api-ag"}}
Step 4: Run your pipeline
Switch back to the Quantemplate app and run your pipeline. We should see that our web server app has received and printed a PipelineCompleted event from Quantemplate!
Updated 9 months ago
